Showing posts with label cheese. Show all posts
Thursday, May 9, 2013
Nailed It! The Bacon and Cheese Scone Quest
I promised you this recipe would come eventually! And lo, here it is!!
So, when I was a wee lass (which I typed first as ass... hilarious), my Nana used to make these bacon cakes. They were triangular shaped like scones often are, moist, delicate and delicious slathered in butter and we would have them for tea. Nana always made "tea" at 6pm. It was her version of supper, the last meal of the day, and it would be malt loaf or eggy bread or ham sandwiches or bacon cakes or something else delightfully carby. It was usually my favorite meal. I would spend my six week long summer holidays with her and I loved tea-time almost as much as I loved blackberrying and rollerskating and her bedtime stories.
I have a few of her recipes and one of them is for bacon cakes. I've diligently made it a few times, and while the result is pretty good, it isn't what my ten year old self remembers. I've tried to tweak it a lot, and finally I decided that instead of just creating a replica, I need to create something that I really like.... something of my own.
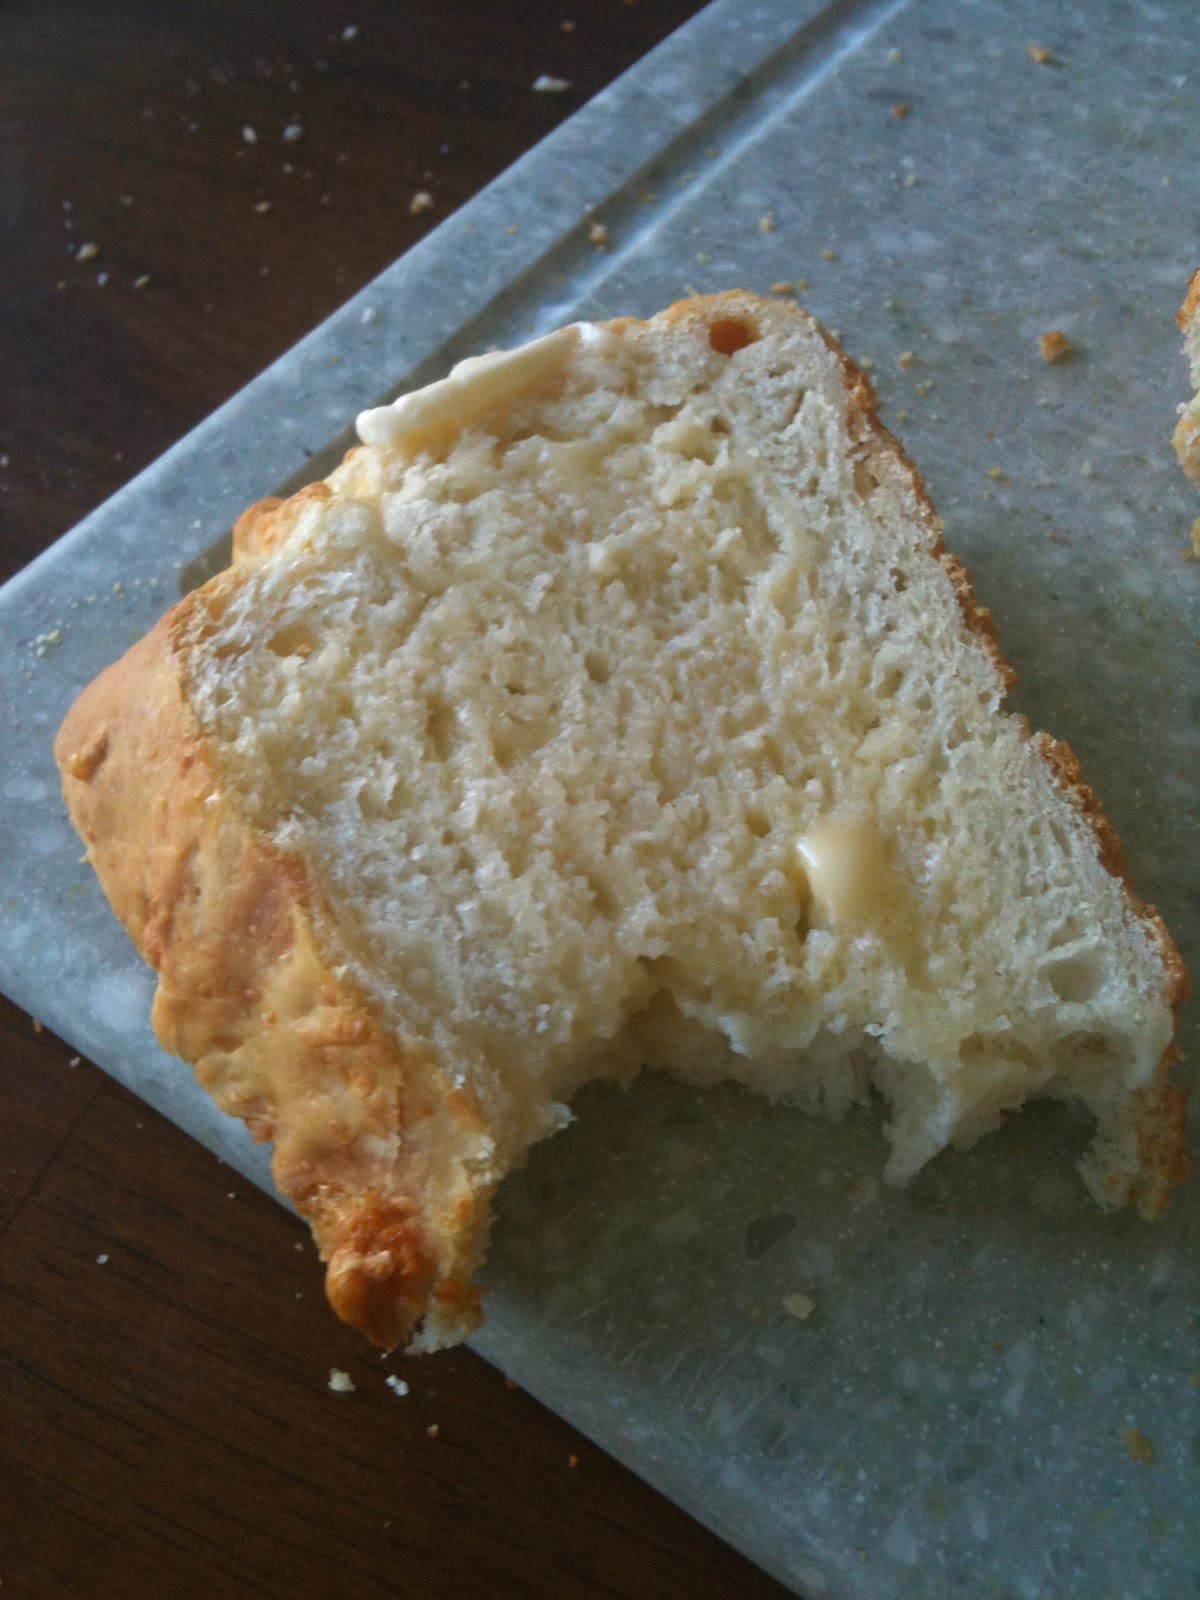
I started over, tweaking, making, kneading, shaping, re-doing. I tried adding ketchup, Worcestershire sauce, cream cheese. I played with the amount of baking powder, the type of milk, the quality of the butter. Until finally one day a few weeks ago I got the result I wanted. I think I've gone through at least nine incarnations of this recipe, but it's finally the one I like best. Ironically, it's probably the one with the fewest ingredients... the simplest version. These are perfect just out of the oven, cut in half and spread with some good quality salted butter.
Bacon and Cheese Scones
4oz Butter (1 Stick), cold
2 1/2 Cups All Purpose Flour
4oz Sharp Cheddar, grated
1 Teaspoon Salt
1 Tablespoon + 1 Teaspoon Baking Powder
3 Slices of Bacon, cooked and diced
1 Scallion, sliced thin
1 Egg
2/3 Cup Milk (any kind)
Preheat your oven to 400F.
In a mixing bowl, combine the butter with the flour, salt and baking powder until it becomes like breadcrumbs. Stir in your cheese, scallion and bacon. Beat the egg into the milk, then slowly add to the dry mixture until combine. Try to mix it as gently and as little as possible.
Roll out the dough until it is an inch thick and cut into circles with a four inch or so cookie cutter. I, owning cookie cutters only in the shape of candy canes and ninjas, used a jam jar lid.
You should get about 8-10 circles out of it. If you like, you can do a quick egg wash glaze over these by beating an egg with a couple of tablespoons of milk and brushing with a pastry brush. It's not completely necessary, but I would take the time if you have it.
Bake for 20 minutes until well risen and turning slightly golden. If you need to reheat these for later, do use the oven and not the microwave... it's much better.
Slather with butter and enjoy hot, with fond memories of your childhood drifting through your head.
Tuesday, August 28, 2012
Bacon and Cheddar Gougeres
It's weird how you get into a routine with things, like writing a food blog, and then when something happens to knock you out of the routine your life feels very off balance. In my brain, I shouldn't be putting this post up since it's a Tuesday and I normally post Monday, Wednesday and Friday. But I figure the best way to get back in the swing of things is to just grab the rope, tarzan yell, and jump.
So, today I jumped into a big plate of Gougeres. I love Gougeres. They are essentially just little pastry puffs. They are made with gruyere normally which is a harder cheese, and I still feel that the classic take is best, but I wanted to play with the idea of making them with ingredients you are more likely to have on hand, like cheddar and bacon. I pretty much always have cheddar and bacon in the house. That and eggs. Without eggs, I would be lost.
So I whipped up these little beauties and I certainly like them. I had five in the first sitting, three more while taking a picture, and another three while putting them into tupperware. They are so little you can just pop them into your mouth. It's easy to lose track.
These would be great for a party, or nice to just have on hand as a snack. They don't get as much height as a normal gougere would, but they still work nicely in my opinion.
Bacon and Cheddar Gougeres
2 Slices of Bacon, cooked crispy
1/2 Cup Milk
3 Tablespoons Butter
1/2 Cup Flour
2 Eggs
1/4 Teaspoon Mustard Powder
1/4 Teaspoon Salt
10 Grinds Black Pepper
3oz Cheddar, finely grated
Preheat the oven to 375F.
Cook your two slices of bacon until they are crispy, then mince them up after they have cooled a little.
Put the milk, butter, mustard, salt and pepper in a saucepan and heat up until the butter has melted. Do not boil. Set aside and grate the cheese finely. You'll probably want to use a Microplane Grater if you have one so the cheese will incorporate better.
Once the cheese is grated, you'll want to move fairly quickly. Take your liquid and dump in all the flour at once. Beat firmly with a spoon, it will form a heavy paste. Add the eggs one at a time and beat well, then add in the bacon and three quarters or more of the cheese. You'll want to reserve a little to top the gougeres with.
On a baking lined with either Sil-Pat or parchment, spoon out 30 rounds of the mix, just over a teaspoon each. You can pipe them out with a pastry bag if you like. Try and coax them into little peaks if you can, but don't worry if it doesn't happen. Sprinkle over the extra cheese.
Bake for 30 minutes until they are golden brown.
Eat one or two every time you walk past the plate in the kitchen. Try not to count.
Makes 30.
Monday, July 23, 2012
Tilapia Fish Cakes and Being Prepared

I really like tilapia. I think I might be one of the few people that adores it. It's a really great base fish. It's easy to cook and it takes seasoning very very well. It's also pretty inexpensive, which is another big tick in the plus column for me.
That was very British, wasn't it?
Anyways. I've been cooking in batches recently to try and replenish my freezer with things that do not require much attention. I generally go through phases where I make extras of things and put them in the freezer so that when I get busy I have quicker options. My reserve was drastically depleted over the last month, so I've been playing around with some good stock up recipes. I hate when I have nothing in the freezer. I feel unprepared for disaster. I think I need to make some quiche again, that worked exceptionally well last time.
I have a secret weapon when it comes to Tilapia. I buy Louisiana Fish Fry in a package and use that to coat a tilapia fillet, then I usually just put it straight in a non-stick skillet with no oil. It's delicious. I know I could probably mix my own fish fry seasoning, but one little package of it is less than a dollar and I use very little. I usually keep it in a jar in my pantry and just pull out what I need. Easy peasy.
So I decided to make fish cakes out of some tilapia so that I could keep them in my freezer, and I also decided to coat them with fish fry to give them a little extra something something. They tasted delicious with some fresh tomato and some Cypress Grove Humboldt Fog Chevre.
Tilapia Fish Cakes
6-8oz Uncooked Tilapia Fillets
2 Tablespoons Tomato Paste
2 Tablespoons Fresh Parsley or Chives, minced
1 Shallot, minced
1 Egg
2/3rd Cup Breadcrumbs
2 Tablespoons Fish Fry Seasoning
Salt and Pepper
Put the tilapia fillets in a mixing bowl and mash up with a fork. Add the tomato paste, herbs, shallot, egg and breadcrumbs. Grind in some salt and pepper. Mix well.
In a shallow bowl or on a small plate, shake out two tablespoons of fish fry seasoning. Divide the fish mixture into four pieces and form it into small patties with your hands, about one inch thick. Coat with the fish fry seasoning.
Heat up a non-stick pan and place the patties in to cook. Turn a couple of times so that they brown evenly. Cooking them will take about ten minutes total.
Eat with something fresh and acidic at three in the afternoon on your day off while sitting at the dining room table reading other peoples blogs.
1 Year Ago : Curried Carrot Soup
Wednesday, May 16, 2012
Parmesan Cheddar Bread and Fond Memories
When I was in college I was nowhere near the cook that I am now. I dabbled around a little, making things like lasagna, but I was never really in love with food. It was years later that a single fried egg made me figure it all out. I look back on the non foodie time in my life and wonder what the heck I ate. I was shuffling through my old old recipe book, and happened upon a version of this recipe. I remembered that I had liked it and it was good, but I'd never been happy with the cheese I used.
Since my cheese drawer is still stuffed from my birthday, I took a peek and figured that this was the perfect recipe for a Tuesday afternoon. I set to work and soon made two delicious crusty loaves. You should make this too. It's really simple and really tasty.
Parmesan Cheddar Bread
Seriously, this recipe is so easy. It takes a total of about three and a half hours with rising time, especially good if you are pottering around the house one afternoon. It freezes beautifully. Use good quality cheese if you have it, and so long as you use a cup or just over a cup, feel free to mix up the ratio.
2 1/4 Teaspoons Yeast (1 package)
2 Teaspoons Salt
1 1/4 Cups Warm Water
4 1/2 Cups Flour
1/2 Cup Cheddar Cheese (fresh grated)
1/2 Cup Parmesan Cheese (fresh grated)
In a large bowl, mix the yeast with 1/2 Cup of the warm water. Stir the salt into the rest of the water and pour that in also. Stir in the flour. Knead the dough for ten minutes, either on a flat surface or using the dough hook of a mixture. You need to be sure to work the dough a lot because this is what makes the texture great.
Grease a large bowl with some oil, butter or cooking spray and set the dough in there.
Cover loosely with plastic wrap so it doesn't dry out. I usually grease the plastic wrap a little so it doesn't stick. Let it rise for two hours or so until it has tripled in size.
I had to transfer it to a bigger bowl. This is after two hours sitting in a 78 degree room.
Punch the dough down. It will sound and feel incredible satisfying.
Next, add your cup of cheese and work it in. This takes some effort to get it evenly distributed, but it is totally worth it.
Split it into two greased loaf pans, cover again, then let it rise for another 45 minutes.
Grate some parmesan on top, then place it in a 450F oven for 20 minutes. Turn the over down to 350F then bake for another 5 minutes. Check if it's down by carefully pulling out a loaf and knocking the bottom of it. If it makes a hollow sound, it's done. If not, give it five more minutes.
There you have it. It's really that simple.
Butter up a slice. Eat. Makes 2 Loaves.
Other recipes you might like:
Monday, May 14, 2012
Salmon, Sun Dried Tomato and Goats Cheese Omlitos

I feel as though I'm living a really muddled life these days. I'm working hard at my job, working hard on surviving being 2,000 miles from the other half of me, working hard on not spending money, working hard on getting this weight taken care of.
There really is a lot of working hard in my life and not very much quiet time. I really need to work on that quiet time. I was planning on getting away this weekend (which for me is tues/weds), but my plans fell through when sadly my partner in crime (the beautiful Tina, who is also working hard on being far from her other half) had to stay in town to finish some house buying stuff.
So now I have the whole weekend to myself. I've got a Groupon for a massage that I think I'm going to pull out, since Marshall is super swamped right now and I'm not willing to put my stressy shoulders on his plate. I've got a little bit of housework to do and a bit of writing, but biggest of all, I'm going to pull everything out of my pantry, figure out what the heck is in there, and come up with some sort of plan to work through it.
When my roommate Josh moved in last week, I hastily made pantry room for him by shoving everything up onto the top two shelves in no semblance of an order. This will not do! Pantry busting shall commence!
So let's start with these little yummies. In my head I call these Omlitos. That's absolutely not a word. I really just made it up. They are like little omletty cupcakes. You can put any kind of leftovers in these, really, but I found the combination of salmon, sun dried tomato, pesto and goat cheese to be a real winner. They are easy to pack up for lunch the next day or two. You could probably even be so bold as to freeze them. I know I'm bringing you two fish dishes in a row, but I'm hoping you'll forgive me!
Salmon, Sun Dried Tomato and Goats Cheese Omlitos
Do yourself a favor. If you don't have a really good muffin pan that nothing ever sticks to, or one of those fancy silicon ones that I still seriously need to figure out how to add to my kitchen, use muffin liners for these. There is no added fat in them, so they have a tendency to stick.
I keep pesto in my freezer for times like this. If you don't have any on hand, use fresh basil instead.
1 Small Salmon Fillet, 4oz, cooked
3 Eggs
2 Tablespoons Sun Dried Tomatoes (chopped)
1 Tablespoon Pesto plus more for topping
2 Tablespoons Goat cheese
Salt and Fresh Ground Pepper
Preheat the oven to 350F. Prepare six cups of a muffin tin so that the mixture will not stick. Use liners, silicon molds, cooking spray, whatever your preferred method is.
In a small bowl, beat the eggs together with some salt and fresh ground pepper. Mix in the sun dried tomatoes and a tablespoon of pesto. Split the cooked salmon between the cups and then pour over the egg mixture, trying to distribute the sun dried tomatoes evenly. Top with a little more pesto and the goats cheese.
Bake for about 22 minutes until the omlitos have risen and cooked all the way. You can serve these either hot or cold. For me it was cold with a slice of toast and a smear of brie, and a light mixed green salad.
Makes 6.
Other recipes you might like:

Thursday, May 10, 2012
Day in the Life #1
Every so often I get into a kind of rut where what I eat doesn't change much, or I'm not really doing much cooking. This isn't particular conducive to writing a food blog. So, it's Day in the Life time. Early morning tea with toast and Laurie's home made plum butter was first up for the day.
My weekends fall on Tuesday/Wednesday. Having weird days off is pretty standard when you work in the entertainment industry, and you get used to it quite quickly. One of the nice things is that on the weekends, life and restaurants feel much busier, but if your Saturday is a Tuesday, everything is nice and quiet.
They are so perfect! The bread there is great too.
I tried the Chicken Piccata. I confess I didn't love it. The sauce was yummy, but it tasted like there was too much egg in the batter. I didn't mean to eat it all, but I finished my plate. Then, it was home to get dolled up for a voice gig. They wanted me on camera so I had to put on good makeup with fancy liquid eyeliner. It turned out that they didn't want to do the camera work after all, and they gave me the script so that I could go and record it from my home studio. Worked out perfectly for me because I hate being on camera and I'd always rather record from home!
Mini-recording session was followed by a short stint at the pool, which was blissfully quiet. I've been reading this fabulous book and I'm loving hearing about what it was like for Julia Child living in Paris in 1949. I would love so much to have been there! It really does sound like a heavenly time for food and wine and camaraderie.
The weekends are my long days in the gym. I usually spend two hours there one of the two nights. This feels like a lot, but it flies by when you're watching the season finale of the Voice. I did an hour of jogging, followed by 20 minutes of weights, then forty minutes of incline walking work.
Finally, some candy imported from back home. When my Dad last visited, he brought me lots of goodies including Quality Streets and Fruit Pastilles. I'm rationing them out, slowly but deliciously!
Labels:
candy,
cheese,
chicken,
cocktails,
dayinthelife,
lunch,
notcooking,
restaurants
Subscribe to:
Posts (Atom)